DIAMONDS 2000 Pro
VERSION 10

This easy to use professional diamond software is a rare combination of power, elegance, simplicity, and value – unmatched by anything on the market.
Diamonds 2000 Pro, Expand The Way You Work!
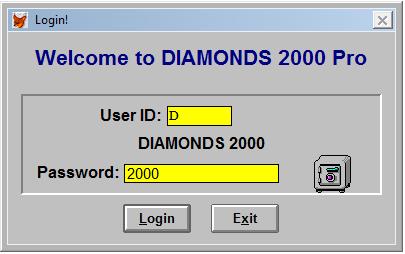
The Login Screen
In order to gain access to this application you must login. To login, enter your User ID and your Password. If you have not been assigned a User ID and Password, please contact the system administrator.

Database Menu Pad
This is the menu’s item where all every day input forms (screens) are called.
Phone Book -Phone Book Data Entry Screen
Customer Table -Customer Data Entry Screen
Supplier Table -Supplier Data Entry Screen
Inventory Table -Inventory Data Entry Screen
Buy / Calls Request -Buy / Calls Request Data Entry Screen
Offers / Price Query -Offers / Price Query Data Entry Screen
Transfer & Combine -Transfer & Combine Between Two Lots
For additional help select Help from the Utilities Menu pad or press the key –F1
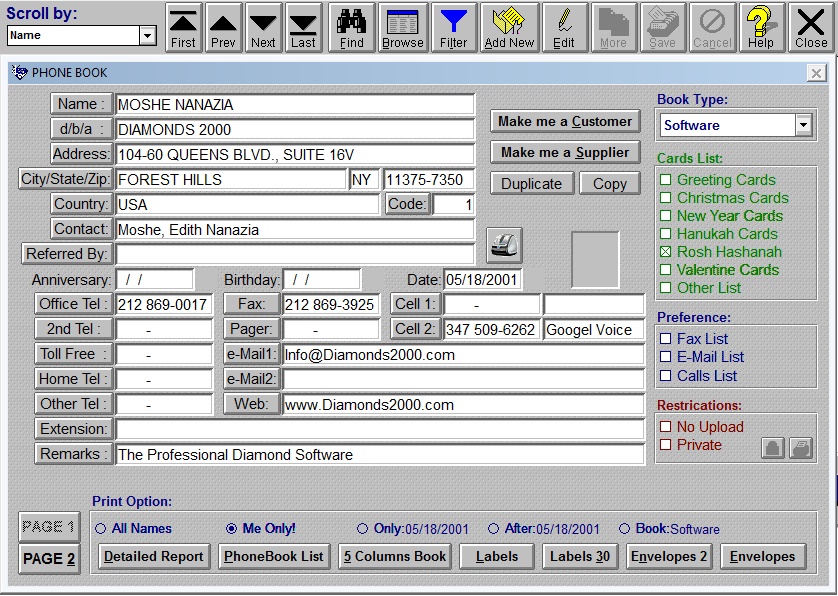
PHONE BOOK Data Entry Screen
Enter all names, address, phone numbers and other basic information. It is your personal directory.
To add a new Name record, press the Add New button in the Toolbar.
To edit Name’s information, press the Edit button in the Toolbar.
As you enter data, watch the left side of the Status Bar for details.
To save, press the Save button in the Toolbar.
Print Push Buttons:
Detailed Report – Press to Print/Preview, Detailed Phone Book (select Print Option).
Phone Book List – Press to Print/Preview, a Phone Book List (select Print Option).
5 Columns Book – Press to Print/Preview, a 5 Columns Book (select Print Option).
Labels/Labels 30 – Press to Print/Preview, a Mailing Label / 30 Labels per Page (select Print Option).
Envelopes 2/Envelopes – Press to Print/Preview, #10 Envelopes / Envelopes with Sender (select Print Option).
Print Option for Print Push Buttons:
All Names – Prints all the names in phone book.
Me Only! – Prints only the current name. (Default option)
Only (date) – Prints only names entered in the date shown between the brackets.
After (date) – Prints only names entered after the date shown between the brackets.
Book (book type) – Prints only names for the current Book Type.
Other Push Buttons:
Copy – Press to copy name, d/b/a, address, city, state & zip code to Clipboard.
Duplicate – Press to add a duplicate record.
Make me a Customer – Press to add this name to the CUSTOMER Data Entry Screen.
Make me a Supplier – Press to add this name to the SUPPLIER Data Entry Screen.
Buttons next to Names / numbers:
Name: – Press to copy Name to Clipboard.
Phones: – Press to copy telephone number to Clipboard & run Windows Dialer.
Fax: – Press to copy faxes number to Clipboard.
E-Mail: – Press to copy e-mail address to Clipboard.
See Also: Using The Toolbar (Last Page)
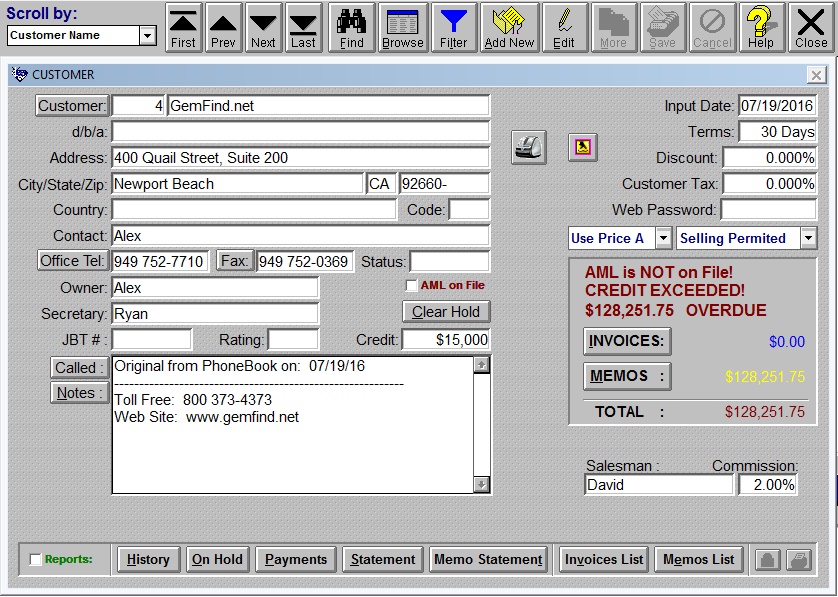
CUSTOMER Data Entry Screen
We strongly recommend that you to enter all customers in PHONE BOOK Data Entry Screen first.
To edit customer’s information, press the Edit button in the Toolbar.
As you enter data, watch the left side of the Status Bar for details.
To save, press the Save button in the Toolbar.
Buttons next to numbers:
Office Tel: – Press to copy numbers to Clipboard & run Windows Dialer.
Fax: – Press to copy numbers to Clipboard.
Permit Pop-up:
Selling Permitted – Enable Memo & Invoice buttons. (Default option)
Selling Denied – Disable access to Memos & Invoices buttons. (Use this option
when you want to block a customer from receiving a new Memo or a new Invoice)
INVOICES: & MEMOS: Buttons.
INVOICES: – Displays the INVOICE Data Entry Screen for this Customer.
MEMOS: – Displays the MEMORANDUM Data Entry Screen for this Customer.
To the right of the buttons you see the amounts of Invoices and Memos.
Press to insert text from Notes: into Customer’s Notes.
The buttons across the bottom will activate reports or browses that are associated with the customer shown.
History – Press to Print/Preview/Browse, History of this Customer
On Hold – Press to Print/Preview/Browse, Stones put on hold for this Customer.
Payments – Press to Print/Preview/Browse, Payments of this Customer
Statement – Press to Print/Preview/Browse, Statement of this Customer
Memo Statement – Press to Print/Preview/Browse, Memo Statement of this Customer.
Invoices List – Press to Print/Preview/Browse, Invoices List of this Customer.
Memos List – Press to Print/Preview/Browse, Memos List of this Customer.
Lock Icon – Press to Lock/Hide this Customer (record) from users with restriction level 2 or above.
Print Icon – Press to Mark this Customer (record) as a No Print option
See Also: Using The Toolbar (Last Page)
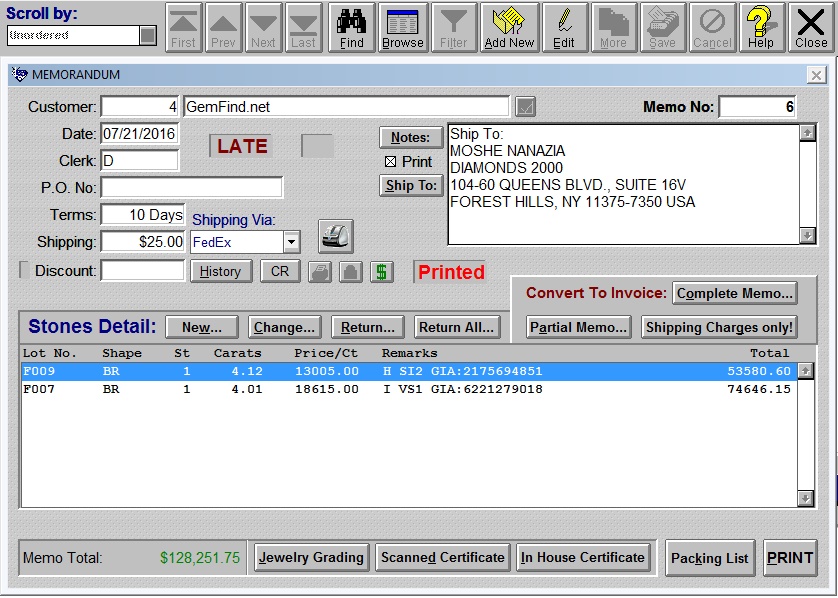
MEMORANDUM Data Entry Screen
This is the data entry screen called from the MEMOS: push button in the Customer screen. This screen functions like any other screen that uses the Toolbar, however only memos that are linked to the current customer can be accessed.
To add a new Memo record, press the Add New button in the Toolbar. (Memo number maybe changed)
To edit Memo’s information, press the Edit button in the Toolbar.
As you enter data, watch the left side of the Status Bar for details.
To save, press the Save button in the Toolbar. (Once saved Memo number becomes permanent)
Ship To: and Notes:
Press to insert Ship/Notes text into Memos Notes. Print will be enabled and text will appear in the bottom of the Memo report.
The New… Change… Return… and Return All… push buttons are associated with the Stones Detail: list that appears in this screen. Selecting New… Will allows new stones to be entered into this screen and display it in the list. Selecting Change… Will allow the currently selected record in the list to be edited (useful for mistakes & partial stones return). Selecting Return… Will ask if the currently selected record in the list should be returned to Inventory. Selecting Return All… Will ask if the entire Memo should be returned to Inventory. If the response to these questions is “Yes”, only stones & carats will be returned to Inventory and removed from the list. Selecting Return… again will permanently remove the item from list. If no information is displayed in the list the Change… and Return… push buttons will be disabled. If the total amount is $0.00 this Memo will be marked VOID.
Convert to Invoice:
Selecting the Complete Memo… Push button will create a new invoice from this entire memo.
Selecting the Partial Memo… Push button will create a new invoice from this highlighted memo detail.
Selecting the Shipping Charges only! Push button will create a new Shipping Invoice without any Stones Detail.
These buttons will create a new Invoice only. To add stones to an existing Invoice see Invoice from Memo(s)…
The buttons across the bottom will activate reports that are associated with the Memo shown.
PRINT – Press to Print/Preview this Memo.
Packing List – Press to Print/Preview this Memo without any prices.
In House Certificate – Press to Print/Preview all In House Certificates in this memo.
Scanned Certificate – Press to Print/Preview all Scanned Certificates in this memo.
Shipping Label – Press to Print/Preview a Shipping Label.
See Also: Using The Toolbar (Last Page)

MEMO DETAIL Data Entry Screen
This is the screen called from the New… Change… push buttons in the Memorandum Data Entry Screen. This screen is used to add to or change the information displayed in the Stones Detail list.
To enter a new lot type Lot No., if not sure press Enter. Entries in this field are looked up in the Inventory table. If an entry is made that is not found in the Inventory table a pop-up of valid selections will be displayed. To select an item from the pop-up, hi-light the item and press enter.
The Save and Cancel push buttons determine what action to take in this data entry window. If Save is selected the record that has been entered is saved and the window is closed. If Cancel is selected the system will ask if changes should be canceled. If the response to this question is “Yes”, all changes are discarded and the window is closed.
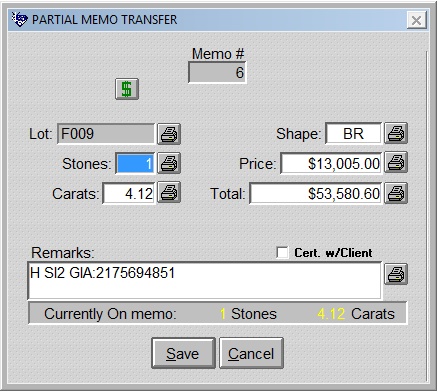
PARTIAL MEMO TRANSFER (to Invoice) Screen
This is the screen called from the Convert To Invoice: Partial Memo… push button in the Memorandum Data Entry Screen. This screen is used to add to or change the information displayed in the Stones Detail list.
The Save and Cancel push buttons determine what action to take in this data entry window. If Save is selected the record that has been entered is saved and the window is closed. If Cancel is selected the system will ask if changes should be canceled. If the response to this question is “Yes”, all changes are discarded and the window is closed.
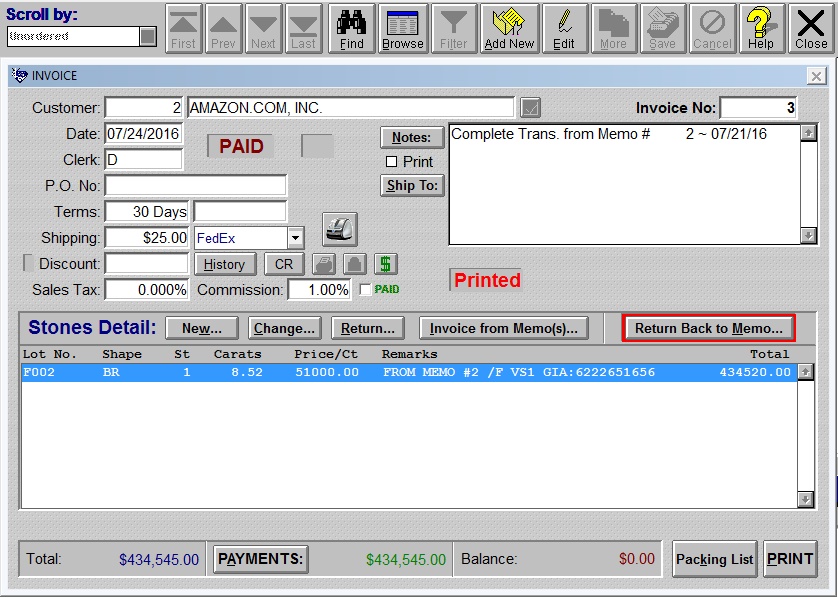
INVOICE Data Entry Screen
This is the data entry screen called from the INVOICES: push button in the Customer screen. This screen functions like any other screen that uses the Toolbar, however only Invoices that are linked to the current customer can be accessed.
To add a new Invoice record, press the Add New button in the Toolbar.
To edit Invoice’s information, press the Edit button in the Toolbar.
As you enter data, watch the left side of the Status Bar for details.
To save, press the Save button in the Toolbar.
Ship To: and Notes:
Press to insert Ship/Notes text into Invoice Notes. Print will be enabled and text will appear in the bottom of the Invoice report.
The New… Change… and Return… push buttons are associated with the Stones Detail: list that appears in this screen. Selecting New… Will allows new stones to be entered into this screen and display it in the list. Selecting Change… Will allow the currently selected record in the list to be edited (useful for mistakes & partial stones return). Selecting Return… Will ask if the currently selected record in the list should be returned to Inventory. If the response to this question is “Yes”, only stones & carats will be returned to Inventory and removed from the list. Selecting Return… again will permanently remove the item from list. If no information is displayed in the list the Change… and Return… push buttons will be disabled. If total amount is $0.00 this Invoice will be marked VOID.
Check the box [x] Paid Commission if commission was paid to your Salesman.
Selecting Invoice from Memo(s)… Push Button will open up a MEMO DETAIL TO INVOICE Data Entry Screen that allows transfer of additional memos into this Invoice.
Selecting Return to Memo… Push Button will return highlighted detail to the original memo.
The buttons across the bottom will activate reports that are associated with the Invoice shown.
PRINT – Press to Print / Preview this Invoice.
Packing List – Press to Print/Preview this Invoice without any prices.
PAYMENTS: – Press to open this INVOICE PAYMENT LIST Screen.
Lock Icon – Press to Lock/Hide this Invoice (record) from users with restriction level 2 or above.
Print Icon – Press to Mark this Invoice (record) as a No Print option
See Also: Using The Toolbar (Last Page)
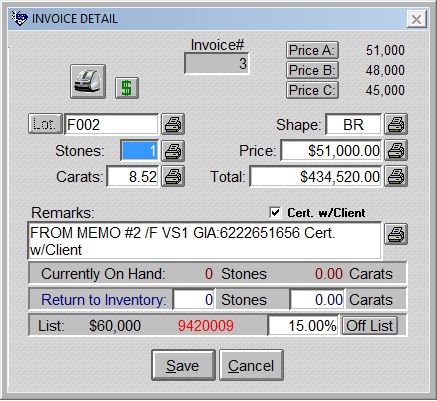
INVOICE DETAIL Data Entry Screen
This is the screen called from the New… Change… push buttons in the INVOICE Data Entry Screen. This screen is used to add to or change the information displayed in the Stones Detail list.
To enter a new lot type Lot No., if not sure press Enter. Entries in this field are looked up in the Inventory table. If an entry is made that is not found in the Inventory table a pop-up of valid selections will be displayed. To select an item from the pop-up, hi-light the item and press enter.
The Save and Cancel push buttons determine what action to take in this data entry window. If Save is selected, the record that has been entered is saved and the window is closed. If Cancel is selected, the system will ask if changes should be canceled. If the response to this question is “Yes”, all changes are discarded and the window is closed.
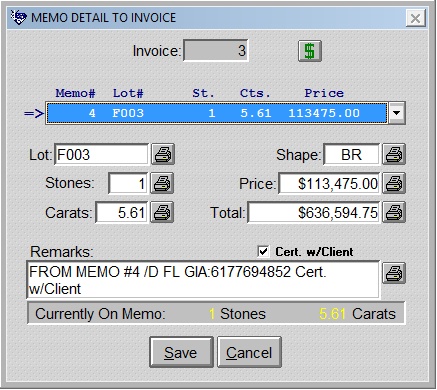
MEMO DETAIL TO INVOICE Data Entry Screen
This is the screen called from the Invoice from Memo(s)… push button in the INVOICE Data Entry Screen. This screen is used to add to or change the information displayed in the Stones Detail list.
The Save and Cancel push buttons determine what action to take in this data entry window. If Save is selected, the record that has been entered is saved and the window is closed. If Cancel is selected, the system will ask if changes should be canceled. If the response to this question is “Yes”, all changes are discarded and the window is closed.
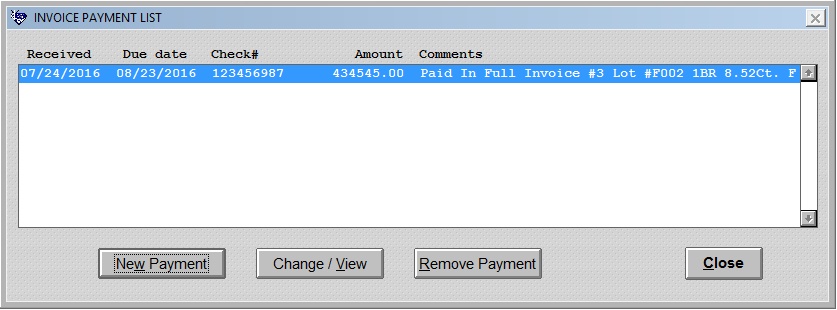
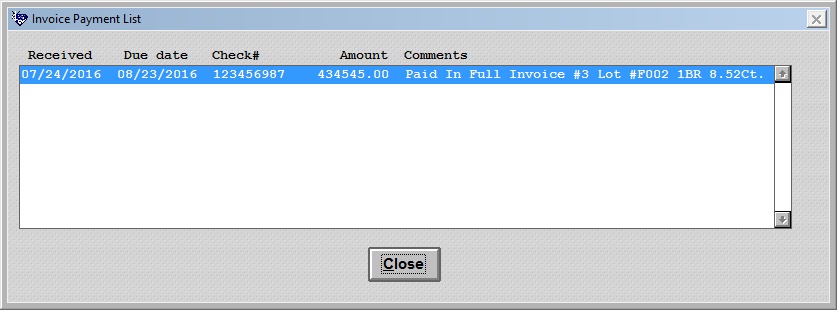
INVOICE PAYMENT LIST Screen
This is the screen called from the PAYMENTS: push button in the INVOICE Data Entry Screen. The list displays all of the Payments related to this invoice.
Selecting New Payment will allows new payment to be entered into this screen and display it in the list.
Selecting Change/View will allows the currently selected record in the list to be edited (useful for mistakes & check returns). Selecting Remove Payment will ask if the currently selected record in the list should be deleted. If the response to this question is “Yes”, payment will be deleted and removed from the list.
If no payments are in the list Change/View and Remove Payment push buttons will be disabled.
To complete transactions press the DONE! Button.
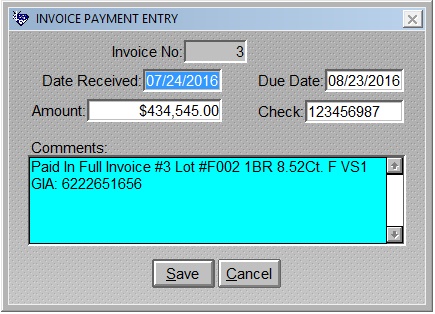
INVOICE PAYMENT Data Entry Screen
This is the screen called from the New Payment and Change/View push buttons in the INVOICE PAYMENT LIST Screen. This screen is used to add to or change the information displayed in the INVOICE PAYMENT LIST Screen
The Save and Cancel push buttons determine what action to take in this data entry window. If Save is selected the record that has been entered is saved and the window is closed. If Cancel is selected, the system will ask if changes should be canceled. If the response to this question is “Yes”, all changes are discarded and the window is closed.
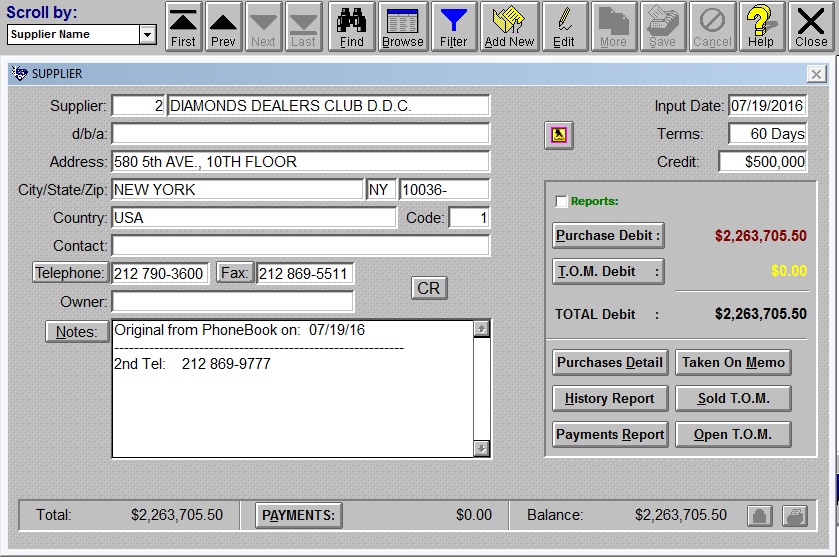
SUPPLIER Data Entry Screen
It is strongly recommended to enter all suppliers in PHONE BOOK Data Entry Screen first.
To edit Supplier’s information press the Edit button in the Toolbar.
As you enter data, watch the left side of the Status Bar for details.
To save, press the Save button in the Toolbar.
Buttons next to numbers:
Telephones: – Press to copy number to Clipboard & Run Windows Dialer.
Fax: – Press to copy number to Clipboard.
Purchase Debit: – Press to Print/Preview/Browse, Purchases Debit for this supplier.
T.O.M Debit: – Press to Print/Preview/Browse, Memos Debit for this supplier.
To the right of the buttons you see the amounts of purchase and taken on memo debits.
Press to insert text from Notes: into Supplier’s Notes.
The buttons Purchases Detail, Purchases List, Taken On Memo, T.O.M Lists, Payments Report & History Reports, produce reports or browses that are associated with the Supplier shown.
Purchases Detail – Print/Preview, all purchases detail of this supplier.
Purchases List – Print/Preview, all purchases list of this supplier.
Taken On Memo – Print/Preview, all memo detail of this supplier.
T.O.M Lists – Print/Preview, all memo list of this supplier.
Payments Report – Print/Preview, all payments report of this supplier.
History Report – Print/Preview, all history report of this supplier.
PAYMENTS: – Press to get to this SUPPLIER PAYMENT LIST Screen.
Lock Icon – Press to Lock/Hide this Supplier (record) from users with restriction level 2 or
above.
Print Icon – Press to Mark this Supplier (record) as a No Print option
See Also: Using The Toolbar (Last Page)
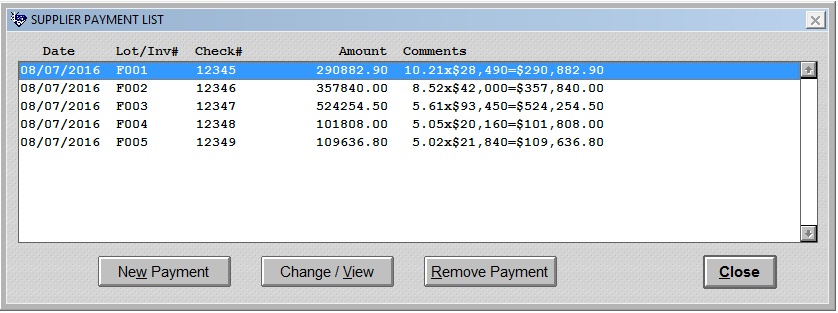
SUPPLIER PAYMENT LIST Screen
This is the screen called from the PAYMENTS: push button in the SUPPLIER Data Entry Screen. The list displays all of the Payments related to this supplier.
Selecting New Payment will allow new payment to be entered into this screen and display it in the list.
Selecting Change/View will allow the currently selected record in the list to be edited (useful for mistakes & check returns). Selecting Remove Payment will ask if the currently selected record in the list should be deleted. If the response to this question is “Yes”, payment will be deleted and removed from the list.
If no payments are in the list Change/View and Remove Payment push buttons will be disabled.
To complete transactions press the DONE! Button.
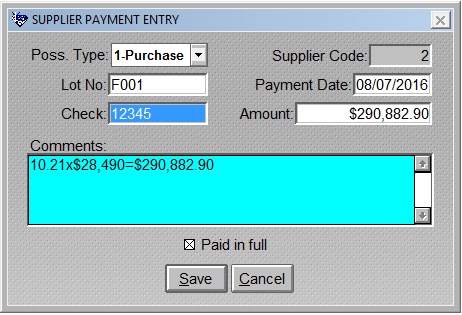
SUPPLIER PAYMENT Data Entry Screen
This is the screen called from the New Payment and Change/View push buttons in the SUPPLIER PAYMENT LIST Screen. This screen is used to add to or change the information displayed in the SUPPLIER PAYMENT LIST Screen.
Enter Lot number / Supplier Invoice number or Supplier Memo number. Possession Type and Amount will be calculated based on information in the INVENTORY Data Entry Screen.
Check the box [x] paid in full for Lot / Supplier Invoice or Supplier Memo that are fully paid. Partial payment to Supplier Memo should remain as Taken on Memo, and Paid in full should remain unchecked.
The Save and Cancel push buttons determine what action to take in this data entry window. If Save is selected the record that has been entered is saved and the window is closed. If Cancel is selected the system will ask if changes should be canceled. If the response to this question is “Yes”, all changes are discarded and the window is closed.
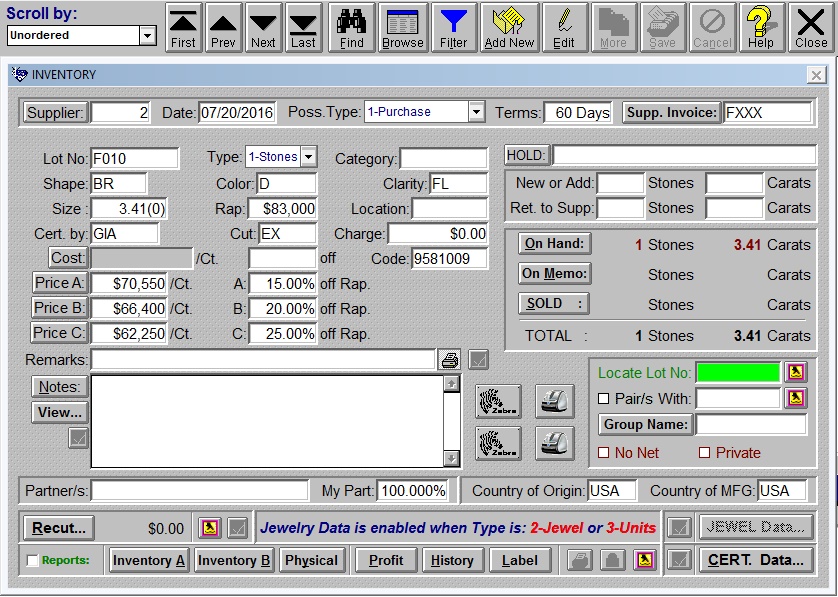
INVENTORY Data Entry Screen
To add a new Lot record, press the Add New button in the Toolbar.
To edit Lot information, press the Edit button in the Toolbar.
As you enter data, watch the left side of the Status Bar for details.
To save, press the Save button in the Toolbar.
Supplier code: Entries in this field are looked up in the Supplier table. If an entry is made that is not found in the Supplier table, a pop-up of valid selections will be displayed. To select an item from the pop-up, hi-light the item and press enter.
Supplier code, and a new Lot No must be entered! Possession type (Purchase or Taken on memo) should be selected.
Also the number of stones and the amount of carats should be entered on the right side of the screen.
For Diamond Shape, Diamond Color or Diamond Clarity that are not found in the pop-up table, go to the proper table in the utilities menu and add a new record.
To create a new lot or edit an old one, type number of new or added stones and new or added carats to this lot.
You must enter the 3 characters (GIA, EGL, IGI, etc.) in order to locate a stone by the Gem Laboratory. (GIA, EGL, IGI, etc.)
To return stones to supplier, type number of returned stones and returned carats.
For a certified stone type list price, that will enable you to use the (%) off list for the selling prices. If list price is blank the (%) off list is disabled.
On Hand: – Press to browse all stones On Hand of your entire Inventory.
On Memo: – Press to Print/Preview/Browse, stones out on memo from this lot number.
SOLD: – Press to Print/Preview/Browse, sold stones from this lot number.
Inventory A – Press to Print/Preview/Browse, your entire stock with code, Sort by: Shape, Size, and Lot No.
Inventory B – Press to Print/Preview/Browse, your entire stock for customer, Sort by: Shape, Size, and Lot No.
Physical – Press to Print/Preview/Browse, physical stock with code, Sort by: Shape, Size, and Lot No.
Lock Icon – Press to Lock/Hide this Lot No. (record) from users with restriction level 2 or above.
Print Icon – Press to Mark this Lot No. (record) as a No Print option
History – Press to Print/Preview/Browse, history of this lot no.
Profits – Press to Print/Preview/Browse, profit for this lot no.
Label – Press to Print/Preview, parcel label for this lot. (With option of all lots entered the same day)
Recut… – Press to call the Recut screen.
CERT. Data… – Press button to access your CERTIFICATE / GRADING Data Entry Screen for this Lot No.
JEWEL Data… – Press button to access your JEWELRY Data Entry Screen for this Lot No.
See Also: Using The Toolbar (Last Page)
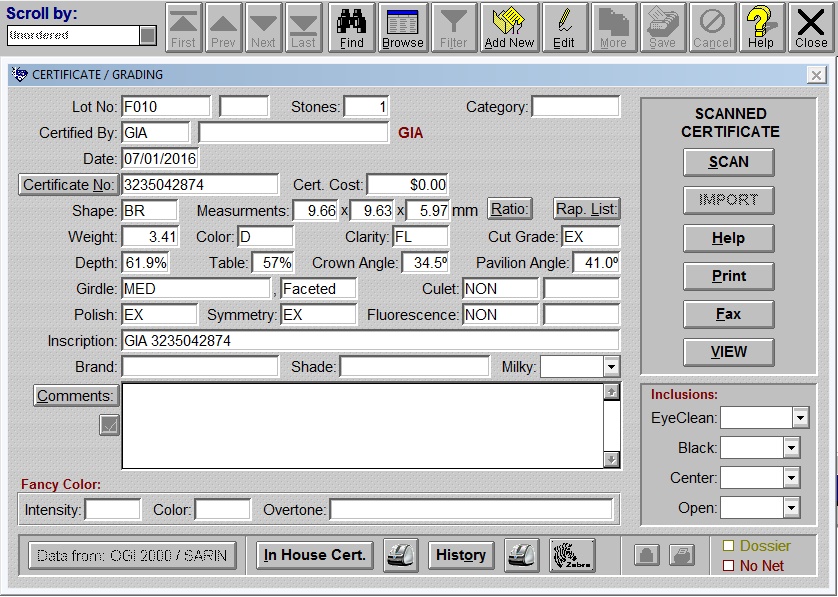
CERTIFICATE / GRADING Data Entry Screen
To add a new Certificate record, press the Add New button in the Toolbar.
To edit Certificate information, press the Edit button in the Toolbar.
As you enter data, watch the left side of the Status Bar for details.
To save, press the Save button in the Toolbar.
For Diamond Shape, Diamond Color or Diamond Clarity that are not found in the pop-up table, go to the proper table in the utilities menu and add a new record.
To create your own certificate or to have a copy with the description of the original certificate, simply fill in the blanks.
You must enter the 3 characters (GIA, EGL, IGI, etc.) in order to locate a stone by the Gem Laboratory. (GIA, EGL, IGI, etc.)
PRINT in House cert. – Press to Print/Preview, a Certificate DATA for this lot.
Press Comments: to insert text from Notes: into Certificate’s Comments.
To enter an original scanned certificate you must have a scanner!
Scan the certificate with your scanner software, save it to any directory on your Hard Drive first! (C:\certs)
IMPORTANT! Scan your certificate at 150-200 dpi and save as Mono BMP image file. (Lot#. BMP)
Then from Diamonds 2000 Press the IMPORT Button! (Screen must be in Edit mode!)
This option will open a dialog with all available drives.
Double click on c:\ and find that directory. (C:\certs)
Double click on that directory. (C:\certs) and Diamonds 2000 will select your Scanned file (Lot#. BMP) Press Save.
IMPORT Button – Press to import your Scanned Certificate for this lot. This option will open a dialog with all available drives. (Screen must be in Edit mode!)
HELP Button – Press for Help?
PRINT/FAX Button – Press to Print/Preview/Fax, Scanned Certificate(s) for this lot.
VIEW Button – Press to View, Scanned Certificate(s) for this lot.
Lock Icon – Press to Lock/Hide this Certificate (record) from users with restriction level 2 or above.
Print Icon – Press to Mark this Certificate (record) as a No Print option
See Also: Using The Toolbar (Last Page)
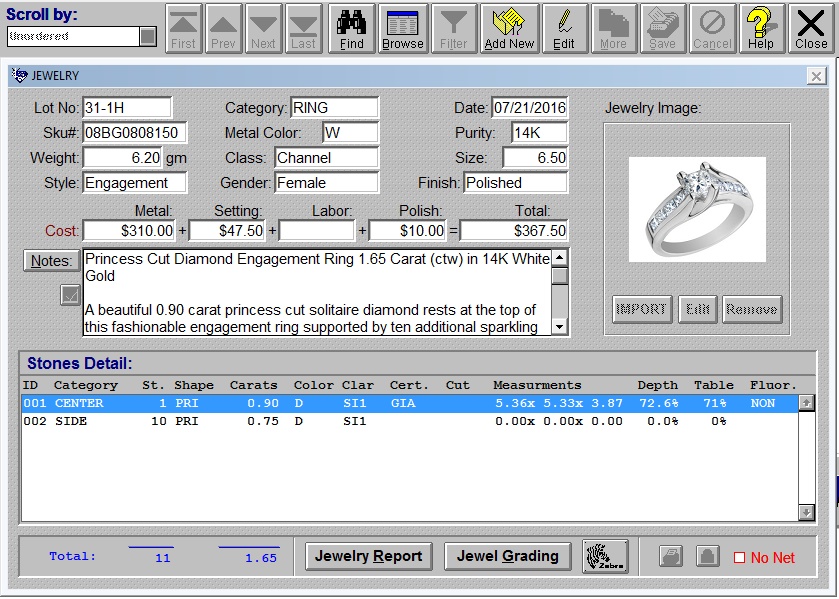
JEWELRY Data Entry Screen
To add a new Jewelry record, press the Add New button in the Toolbar.
To edit Jewelry information, press the Edit button in the Toolbar.
As you enter data, watch the left side of the Status Bar for details.
To save, press the Save button in the Toolbar.
For Jewelry category, Class, Style and Gender or Metal Color or Metal Purity that are not found in the pop-up table, go to the proper table in the utilities menu and add a new record.
To create your own Jewelry Grading Report, simply fill in the blanks.
Jewelry Grading – Press to Print/Preview, a Jewelry Grading Report for this lot.
Press Notes: to insert text from Notes: into Jewelry Notes.
To enter a new or replaced Jewelry Image copy the source Press the Edit button and Paste into the screen (any format)
Or save it to any directory on your Hard Drive first! (C:\images)
IMPORTANT! Reduce Image to 72-96 dpi and save as color BMP image file. (Lot#. BMP)
Then from Diamonds 2000 Press the IMPORT Button! (Screen must be in Edit mode!)
This option will open a dialog with all available drives.
Double click on C:\ and find that directory. (C:\images)
Double click on that directory. (C:\ images) and Diamonds 2000 will select your image file (Lot#. BMP)
Press Save.
IMPORT Button – Press to import your Jewelry Image for this lot. This option will open a dialog with all available drives. (Screen must be in Edit mode!)
Edit Button – Press to Paste source Jewelry Image into the screen (any format)
Remove Button – Press to Remove Jewelry Image from screen for this lot.
Lock Icon – Press to Lock/Hide this Jewelry (record) from users with restriction level 2 or above.
Print Icon – Press to Mark this Jewelry (record) as a No Print option
See Also: Using The Toolbar (Last Page)
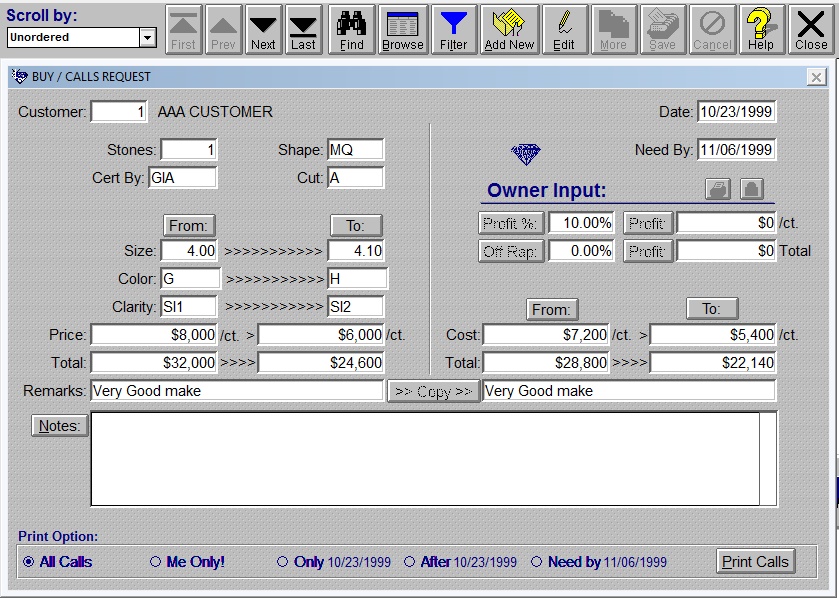
BUY / CALLS REQUEST Data Entry Screen
To add a new Buy/Call Request record, press the Add New button in the Toolbar.
To edit Buy/Call Request information, press the Edit button in the Toolbar.
As you enter data, watch the left side of the Status Bar for details.
To save, press the Save button in the Toolbar.
Customer code: Entries in this field are looked up in the customer table. If an entry is made that is not found in the customer table a pop-up of valid selections will be displayed. To select an item from the pop-up, hi-light the item and press enter.
For Diamond Shape, Diamond Color or Diamond Clarity that are not found in the pop-up table, go to the proper table in the utilities menu and add a new record.
You must enter the 3 characters (GIA, EGL, IGI, etc.) in order to locate a stone by the Gem Laboratory. (GIA, EGL, IGI, etc.)
Customer code must be entered! Also the range of sizes, colors and clarities should be entered!
Optional: Enter range of price per carats and or total price.
Owner Input:
Enter your desired profit in one of following formats: % off customer price, % off Rap List, $ per carat, total $.
Print Option for Print Push Buttons: (with the exception of No Print)
All Calls – Prints all of your calls. (Default option)
Me Only! – Prints only the current call.
Only (date) – Prints only calls entered in the date shown between the brackets.
After (date) – Prints only calls entered after the date shown between the brackets.
Need by (date) – Prints only calls for the date shown between the brackets.
Notes:
Press to insert text from Notes: into Buy/Calls Request Notes.
Lock Icon – Press to Lock/Hide this Call (record) from users with restriction level 2 or above.
Print Icon – Press to Mark this Call (record) as a No Print option
- Print or fax those lists to your suppliers.
- Print those lists as your buying list.
See Also: Using The Toolbar (Last Page)
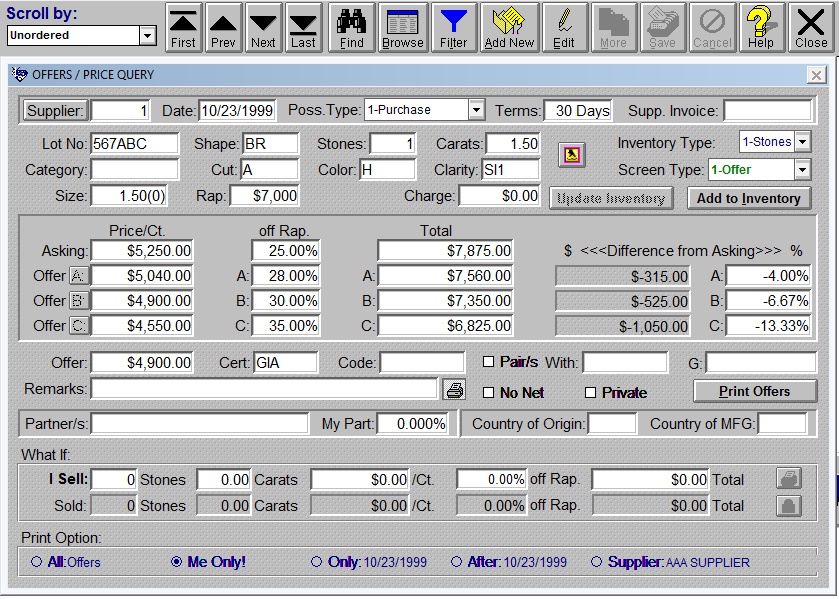
OFFERS / PRICE QUERY Data Entry Screen
To add a new Offers/Price Query record, press the Add New button in the Toolbar.
To edit Offers/Price Query request information, press the Edit button in the Toolbar.
As you enter data, watch the left side of the Status Bar for details.
To save, press the Save button in the Toolbar.
Supplier code: Entries in this field are looked up in the Supplier table. If an entry is made that is not found in the Supplier table a pop-up of valid selections will be displayed. To select an item from the pop-up, hi-light the item and press enter.
Supplier code, Lot No, stones and the amount of carats must be entered! Possession type (Purchase or Taken on memo) should be selected.
For Diamond Shape, Diamond Color or Diamond Clarity that are not found in the pop-up table, go to the proper table in the utilities menu and add a new record.
Type list price, this will enable you to use the (%) off list for the selling prices. If list price is blank the (%) off list is disabled.
Print Option for Print Push Buttons:
All Offers – Prints all of your offers.
Me Only! – Prints only the current offer. (Default option)
Only (date) – Prints only offers entered in the date shown between the brackets.
After (date) – Prints only offers entered after the date shown between the brackets.
Supplier (Supplier) – Prints only offers for the current supplier.
Convert Offer to Price Query.
Change, Type: from Offer to Price Query.
Change, Cost: from Asking to Cost.
Change, Price A: B: and C: from Offer A: B: and C: to Price A: B: and C:
Now you are ready to add this lot to inventory!
Add to Inventory – Press button to make this Price Query a new lot in inventory.
Lock Icon – Press to Lock/Hide this Lot No. (record) from users with restriction level 2 or above.
Print Icon – Press to Mark this Lot No. (record) as a No Print option
See Also: Using The Toolbar (Last Page)
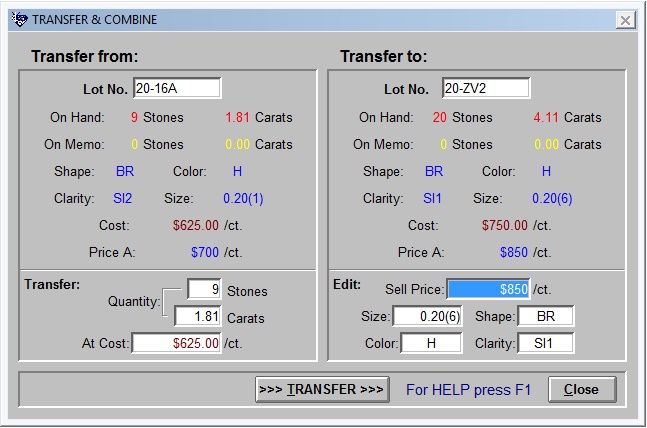
TRANSFER & COMBINE Screen
From this screen you can transfer stones & carats from one lot to the other (as long as they are both in Inventory).
Transfer from:
Type the Lot from which the stones will be taken.
Type the quantity of stones to be transferred.
Type the carats to be transferred.
Type at what cost (per carat) to be transferred.
Transfer to:
Type the Lot to which the stones will be transferred.
Type the new selling price (per carat) for the combined lot.
DIAMONDS 2000 will compute size for the combined lot.
Type the shape for the combined lot.
Type the clarity for the combined lot.
Type the color for the combined lot.
Press the >>> TRANSFER >>> button to complete the transfer.
DIAMONDS 2000 will compute the new size, stones, carats, and cost for the both lots.
After the message TRANSFER COMPLETED!!! You can continue to transfer more lots OR press the DONE! Button.
At any time before pressing the >>> TRANSFER >>> button you can press the Esc key to cancel!
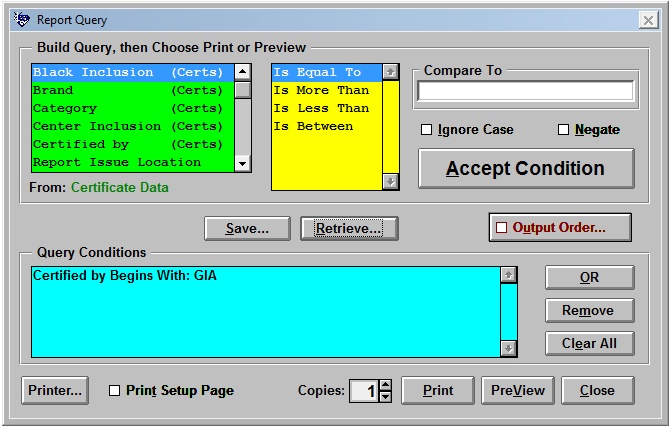
Report Query Dialog
The Report Query dialog allows you build conditions to determine what data should appear in reports and labels.
The following options are listed on the Report Conditions dialog.
Field List: (Green Color Code) Displays all the fields that query criteria may be based on.
Operator List: (Yellow Color Code) Select the comparison operator. The operator displayed in this list change depending on what type of field is selected. The following lists all available operators and the corresponding field types each operator is available for.
Begins With
Finds records where the field begins with string entered.
For Field Type(s): Character, Memo
Is Equal To
Finds records where the entire field matches string entered.
For Field Type(s): Character, Numeric, Date
Contains
Finds records where the field contains string entered.
For Field Type(s): Character, Memo
Ends With
Finds records where the field ends with string entered.
For Field Type(s): Character, Memo
Is In List
Finds records where the field begins with a value contained in a list separated by commas.
For Field Type(s): Character
Is More Than
Finds records where the value of field is greater the value entered in Compare To.
For Field Type(s): Character, Numeric
Is Less Than
Finds records where the value of field is less than the value entered in Compare To.
For Field Type(s): Character, Numeric
Is Between
Finds records where the value of field is between values entered in the “Compare To” fields, which must be separated by a comma.
For Field Type(s): Character, Numeric, Date
Year Is
Finds records where the value of entire field matches the year entered.
For Field Type(s): Date
Month Is
Finds records where the month of the date field matches the month selected from the pop-up. The “Month Is” option displays a popup of months of the year when you TAB to the Compare To field.
For Field Type(s): Date
Day Is
Finds records where the day of the date field matches the day selected from the popup. The “Day Is” option displays a popup of the days of week when you TAB to the Compare To field.
For Field Type(s): Date
Is Yes
Finds records where the field is true. (.T.)
For Field Type(s): Logical
Is No
Finds records where field is false. (.F.)
For Field Type(s): Logical
Compare To:
Enter the criteria of the condition. With some operators, you may enter more than one criterion to “Compare To”. You must separate the criteria with a comma.
For example: To find all records that are in the states of Ohio, California and New York; you would enter the following:
FIELD OPERATOR COMPARE TO
——— —————– ——————–
State Is In List OH,CA,NY
[x] Ignore Case
Ignores whether entry made in “Compare To” field is upper or lower case.
[ ] Negate
Select this check box to make the condition negative.
< Accept Condition >
Accepts and moves the condition to the Conditions Specified list. (Blue Color Code)
Conditions Specified:
Displays the currently selected conditions in the list. (Blue Color Code)
< Add Or >
Adds an OR condition.
< Remove >
Removes selected condition from the conditions list.
< Clear All >
Removes all conditions from the conditions list.
[ ] Output Order
Brings up the Mover dialog to allow the user to select the fields to order the report by.
<Save>
Allows you to save report query conditions for subsequent use. When save is selected you will be prompted with a dialog that allows you to give a meaningful name for the conditions you have created.
<Retrieve>
Allows you to retrieve previously saved report conditions and re-use or edit them.
< Print >
Sends the output to the currently selected output device.
< PreView >
Executes a page preview on the screen; allowing you to view the output of the report before you print it.
< Done >
Closes the Report Conditions dialog and returns to the Report Options dialog.

Information Menu Pad
Stone Query – Stone Query for locating a range of stones.
Profit / Loss – Enter dates and get information.
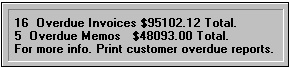
Overdue A/R – Press for Overdue A/R information.
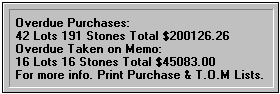
Overdue A/P – Press for Overdue A/P information.
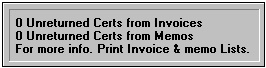
Unreturned Certs – Press for Unreturned Certs information.
Customer Information – All of your Customer memos
Memos Information – All of your memos
Invoices Information – All of your invoices
History Information – All of your History
Jewelry Information – All of your Jewelry
Certificates Information – All of your certificates
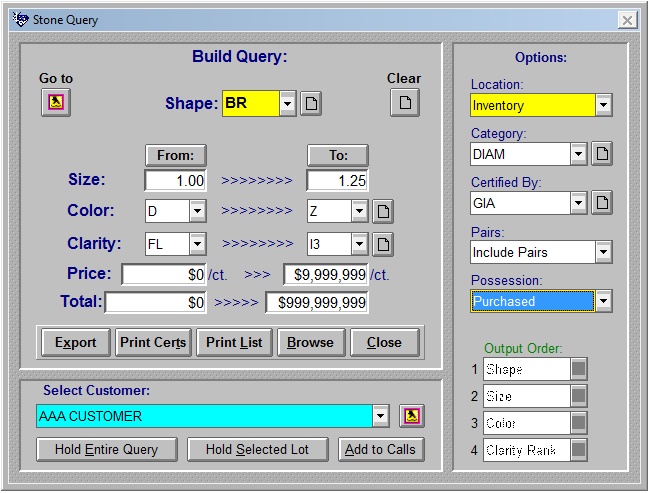
Stone Query Screen
Select Shape of Diamond.
Type from: smaller size to: larger Size.
Type from: better color to: lesser Color.
Type from: better clarity to: lesser Clarity.
Type from: smallest ($/Ct.) amount to: largest ($/Ct.) Amount.
Type from: smallest (total) amount to: largest (total) amount.
Select Option for Query.
BROWSE – Press to browse the query selection.
Print List – Press to Print/Preview/Fax report for the Query Selection.
Print Cert. – Press to Print/Preview/Fax scanned cert. for the Query Selection.
Add to Calls – Press to add query to BUY / CALLS REQUEST Data Entry Screen.
Hold Query – Press to put the entire query (all lots) on hold.
Hold Lot – Press to put the selected lot on hold.
DONE! – Press to close the screen. (Last query remain in memory)
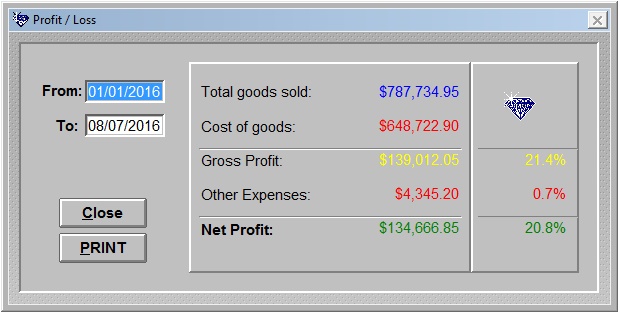
Profit / Loss Screen
Type the starting date & ending date and get your profit or loss for that period.
DONE! Push Button – Press to close the screen.
PRINT Push Button – Press to Print/Preview, a report.
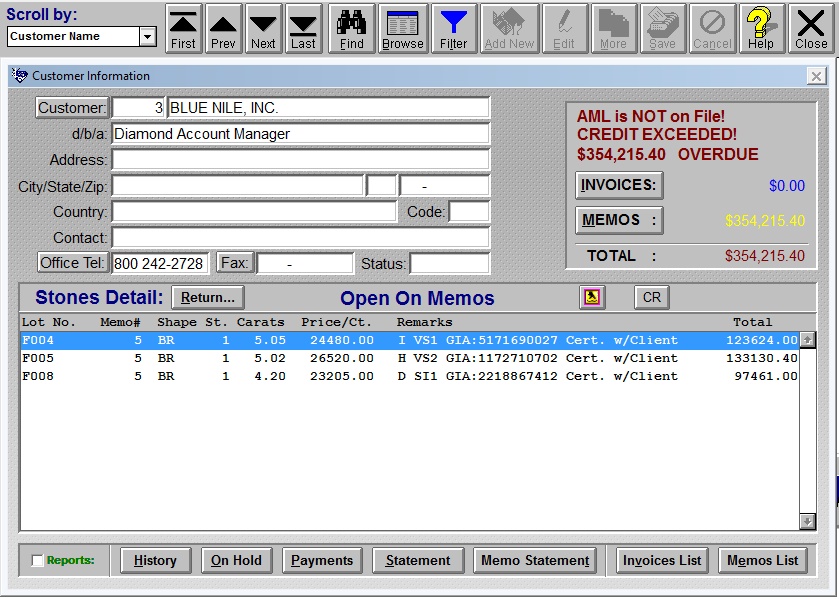
Customer Information Screen
This screen is your customer’s and his Memo Information. No data can be entered from this screen, but you can view all his Memos and return any item on memo from this screen.
Buttons next to numbers:
Office Tel: – Press to copy numbers to Clipboard & run Windows Dialer.
Fax: – Press to copy numbers to Clipboard.
INVOICES: & MEMOS: Buttons.
To the right of the buttons you see the amounts of Invoices and Memos.
The buttons across the bottom will activate reports or browses that are associated with the customer shown.
History – Press to Print/Preview/Browse, History of this Customer
On Hold – Press to Print/Preview/Browse, Stones put on hold for this Customer.
Payments – Press to Print/Preview/Browse, Payments of this Customer
Statement – Press to Print/Preview/Browse, Statement of this Customer
Memo Statement – Press to Print/Preview/Browse, Memo Statement of this Customer.
Invoices List – Press to Print/Preview/Browse, Invoices List of this Customer.
Memos List – Press to Print/Preview/Browse, Memos List of this Customer.
See Also: Using The Toolbar (Last Page)

Memo Information Screen
This screen is your customer’s Memo Information. No data can be entered from this screen, but you can view all the Memos from this screen.
The buttons across the bottom will activate reports that are associated with the Memo shown.
PRINT – Press to Print/Preview this Memo.
Packing List – Press to Print/Preview this Memo without any prices.
In House Certificate – Press to Print/Preview all In House Certificates in this memo.
Scanned Certificate – Press to Print/Preview all Scanned Certificates in this memo.
Jewelry Grading – Press to Print/Preview all Jewelry Grading Report in this memo.
History – Press to Print/Preview, history for this memo.
See Also: Using The Toolbar (Last Page)
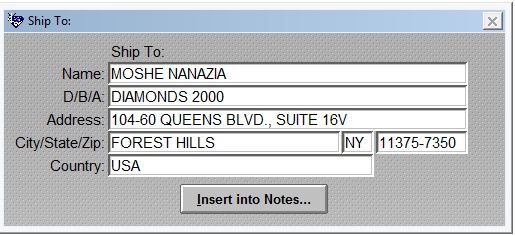
Ship To: Screen
This screen share data with your Phone Book data, you may add shipping address to Invoices and Memos from any name in the Phone Book.
To add a new record or edit information, use the PHONE BOOK Data Entry Screen.
See Also: Using The Toolbar (Last Page)

Invoice Information Screen
This screen is your customer’s Invoice Information. No data can be entered from this screen, but you can view all the Invoices from this screen.
The buttons across the bottom will activate reports that are associated with the Invoice shown.
PRINT – Press to Print / Preview this Invoice.
Packing List – Press to Print/Preview this Invoice without any prices.
PAYMENTS: – Press to open Invoice Information Payment List Screen.
History – Press to Print/Preview, history for this invoice.
Lock Icon – Press to Lock/Hide this Invoice (record) from users with restriction level 2 or above.
Print Icon – Press to Mark this Invoice (record) as a No Print option
See Also: Using The Toolbar (Last Page)
Invoice Information Payment List Screen
This is the screen called from the PAYMENTS: push button in the Invoice Information Screen. The list displays all of the related records.
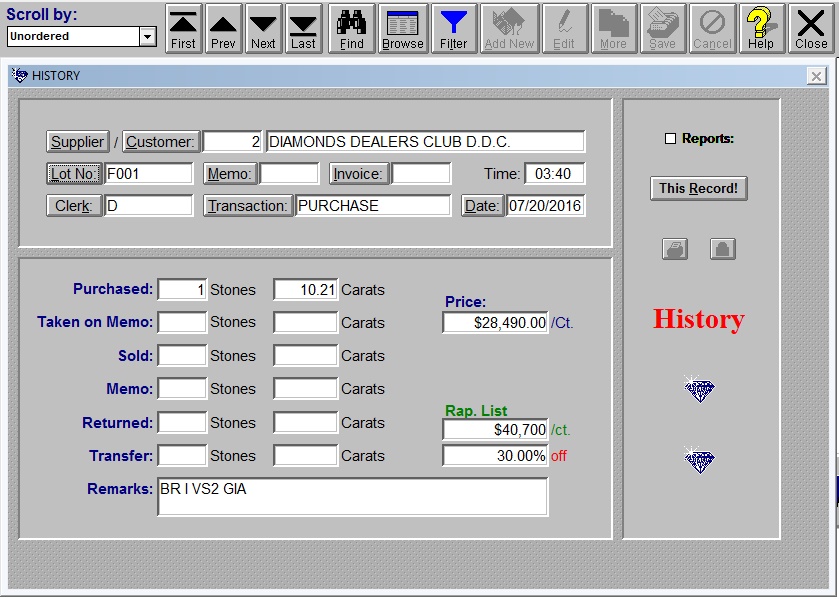
HISTORY Data Screen
Push Buttons:
Supplier: – Press to Print/Preview/Browse, all of this Supplier’s transactions.
Customer: – Press to Print/Preview/Browse, all of this Customer’s transactions.
Lot No: – Press to Print/Preview/Browse, all of this Lot History.
Memo: – Press to Print/Preview/Browse, all of this Memo History.
Invoice: – Press to Print/Preview/Browse, all of this Invoice History.
Clerk: – Press to Print/Preview/Browse, all or the day shown Clerk transactions.
Transactions: – Press to Print/Preview/Browse, all or the day shown transactions.
Date: – Press to Print/Preview/Browse, all of the day shown transactions.
This Record! – Press to Print/Preview/Browse, This history detail.
Lock Icon – Press to Lock/Hide this History record from users with restriction level 2 or above.
Print Icon – Press to Mark this History record as a No Print option
See Also: Using The Toolbar (Last Page)
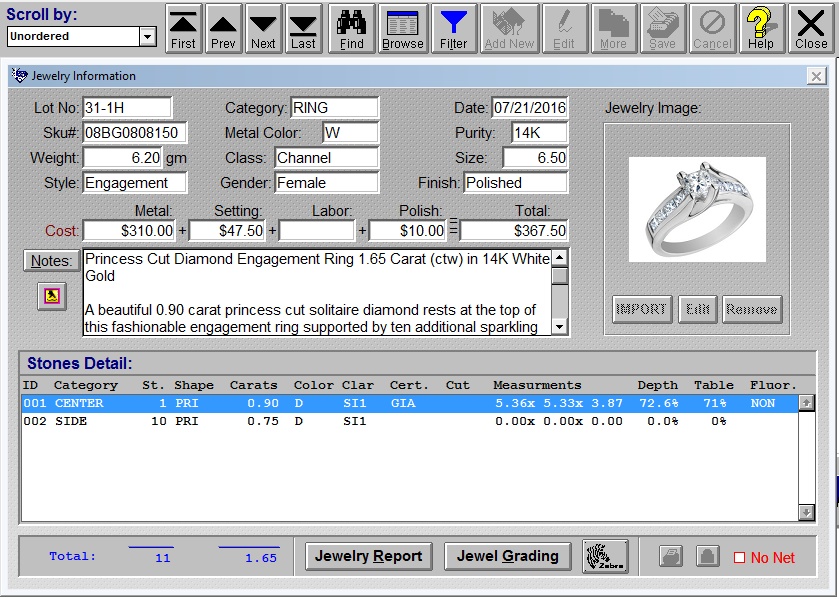
Jewelry Information Screen
No data can be entered from this screen, but you can view all of your Jewelry.
See Also: JEWELRY Data Entry Screen
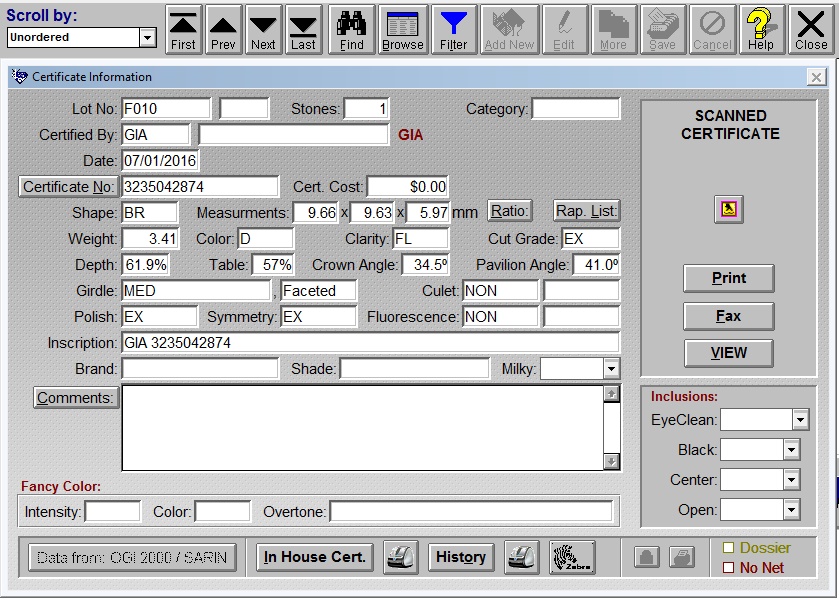
Certificate Information Screen
No data can be entered from this screen, but you can view all of your certificates.
See Also: CERTIFICATE / GRADING Data Entry Screen
Backups! (Data Security)
Why Backup?
There are only two types of data
1) Data that has been backed up.
2) Data that has not yet been lost.
Protect your investment. Backup is necessary because there are so many ways to lose data!
To name a few:
Human Error; System Crashes; Tampering; Software Viruses; Act of Nature…
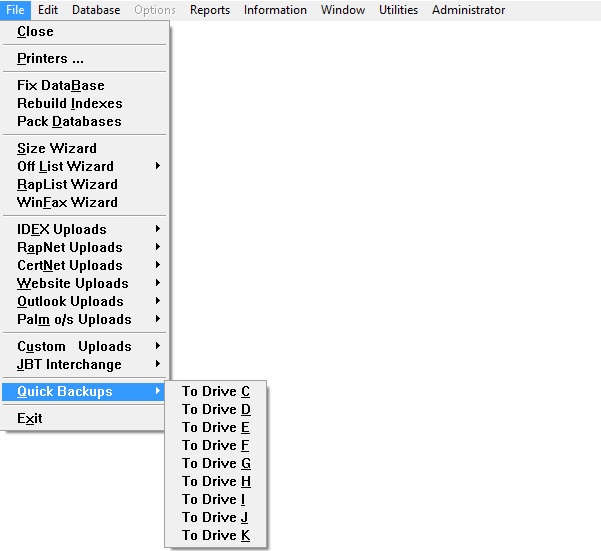
Quick Backups
Quick Backup “To Drive C” will copy your data files, with the exception of your Scanned Certificates to your local drive (C:\backup_$)
This backup provides a fast backup through random access memory and is strongly recommended after any important input. This backup will overwrite your previous backup on your local drive (C:\backup_$).
Daily Backups
At the end of each working day using Quick Backup and a removable media drive.
But this time to your media drive: D, E, F, G, H, I, J, or K (whatever pops up)
This backup overwrites data on your removable media drive (D, E, F, G, H, I, J, or K:\backup_$).
We strongly recommend that you have a set of 5 removable Medias one for each day of the week.
Weekly/Monthly Backups
Backup the entire directory where you installed Diamonds 2000 (Default C:\D2000).
Diamonds 2000 Cloud user? Use the iDrive Backup installed on your Cloud Server already.
Important: Weekly/Monthly Backups are done when Diamonds 2000 is shot down!
For Scanned Certificates – A large removable media, secondary or network drive is a necessity.
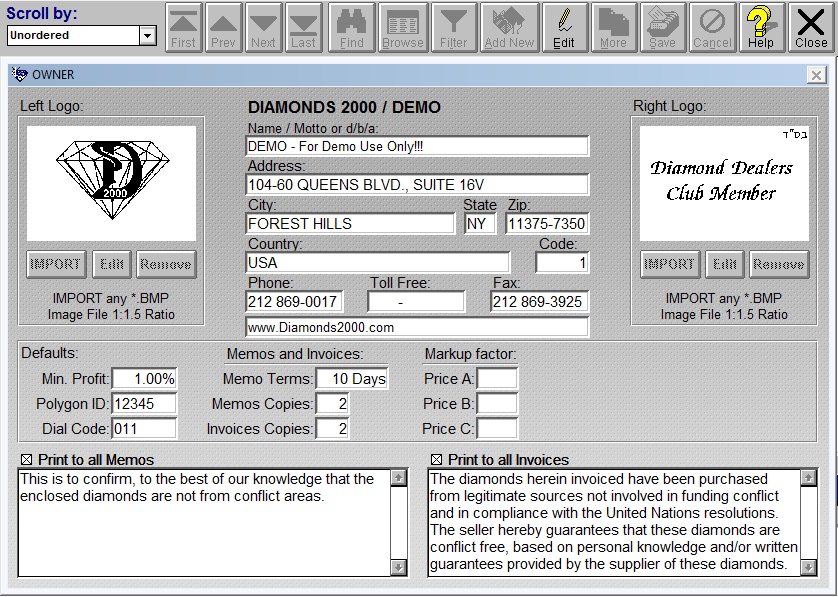
OWNER Data Entry Screen
This is your company’s Information, as it will appear in your Memos, Invoices, Statements and Reports.
To edit, press the Edit button in the Toolbar.
As you enter data, watch the left side of the Status Bar for details.
To save, press the Save button in the Toolbar.
IMPORT Button -Press to Import your adjacent Logo. This option will open a dialog with all available drives.
Minimum Profit: -Minimum Profit (% Over Cost), for Selling Prices.
Polygon ID: -For Polygon members only! Enter your User ID number.
Dial Code: -Type Your International Direct Dialing (Out) Code. (011 for USA)
Default Memo Terms: -Type Default Term for All Memos.
Default Copies: -Type Default Copies, for Memos and Default Copies, for Invoices.
Enable Memo Notes: -Check to Enable Printing Default-Notes into all New Memos.
Enable Invoice Notes: -Check to Enable Printing Default-Notes into all New Invoices.
See Also: Using The Toolbar (Last Page)
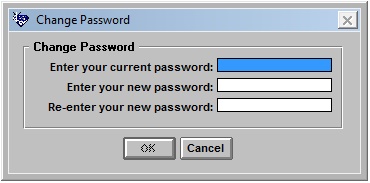
Change Password Screen
This screen will allow you to change your password. You must first enter the current password. Then you can enter your new password. You must then enter the new password again to insure accuracy. Press Tab and then OK.
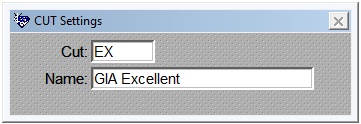
CUT Data Entry Screen
To add a new cut record, press the Add New button in the Toolbar.
To edit Cut information, press the Edit button in the Toolbar.
As you enter data, watch the left side of the Status Bar for details.
To save, press the Save button in the Toolbar.
See Also: Using The Toolbar (Last Page)
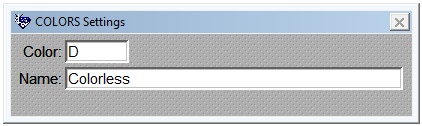
COLORS Data Entry Screen
To add a new Color record, press the Add New button in the Toolbar.
To edit Color information, press the Edit button in the Toolbar.
As you enter data, watch the left side of the Status Bar for details.
To save, press the Save button in the Toolbar.
See Also: Using The Toolbar (Last Page)
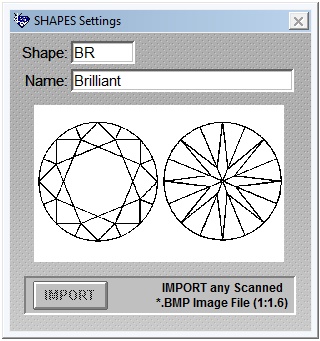
SHAPES Data Entry Screen
To add a new Shape record, press the Add New button in the Toolbar.
To edit Shape information, press the Edit button in the Toolbar.
As you enter data watch the left side of the Status Bar for details.
To save, press the Save button in the Toolbar.
IMPORT Button – Press to Import your Diamond Shape BMP for this Shape. This option will open a dialog with all available drives.
See Also: Using The Toolbar (Last Page)
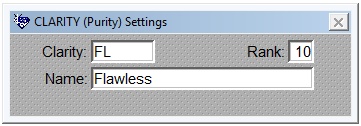
CLARITY Data Entry Screen
To add a new Clarity record, press the Add New button in the Toolbar.
To edit Clarity information, press the Edit button in the Toolbar.
As you enter data, watch the left side of the Status Bar for details.
To save, press the Save button in the Toolbar.
See Also: Using The Toolbar (Last Page)
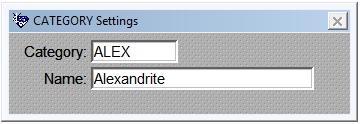
CATEGORY Data Entry Screen
To add a new Category record, press the Add New button in the Toolbar.
To edit Category information, press the Edit button in the Toolbar.
As you enter data, watch the left side of the Status Bar for details.
To save, press the Save button in the Toolbar.
See Also: Using The Toolbar (Last Page)

Inventory and Certificate Cert By (LAB.) Data Entry Screen
You can enter a new Lab. (like GIA, EGL, AGS etc.)
That will appear in the Inventory and Certificates Screens under ” Cert. By:”
To add a new Lab. record, press the Add New button in the Toolbar.
To edit Lab information, press the Edit button in the Toolbar.
As you enter data, watch the left side of the Status Bar for details.
To save, press the Save button in the Toolbar.
See Also: Using The Toolbar (Last Page)
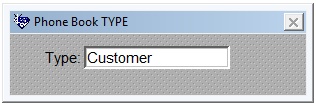
Phone Book TYPE Data Entry Screen
You can enter new Books (like Business, Personal, Family, Friends, etc.)
That will appear in the PHONE BOOK Screen under “Book Type:”
To add a new Book Type record, press the Add New button in the Toolbar.
To edit Book Type information, press the Edit button in the Toolbar.
As you enter data, watch the left side of the Status Bar for details.
To save, press the Save button in the Toolbar.
See Also: Using The Toolbar (Last Page)

Shipping VIA Data Entry Screen
To add a new Shipper record, press the Add New button in the Toolbar.
To edit Shipper information, press the Edit button in the Toolbar.
As you enter data watch the left side of the Status Bar for details.
To save, press the Save button in the Toolbar.
See Also: Using The Toolbar (Last Page)
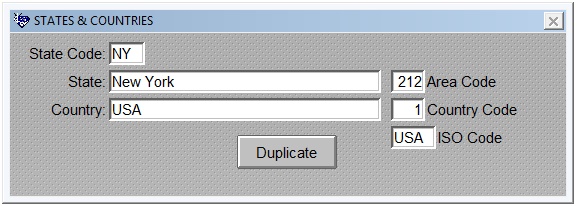
STATES & COUNTRIES Data Entry Screen
This screen is States, Area and Countries, Codes & Names DATA!
To add a new States & Countries record, press the Add New button in the Toolbar.
To edit States & Countries information, press the Edit button in the Toolbar.
As you enter data, watch the left side of the Status Bar for details.
To save press the Save button in the Toolbar.
Duplicate – Press to Add a Duplicate Record.
See Also: Using The Toolbar (Last Page)
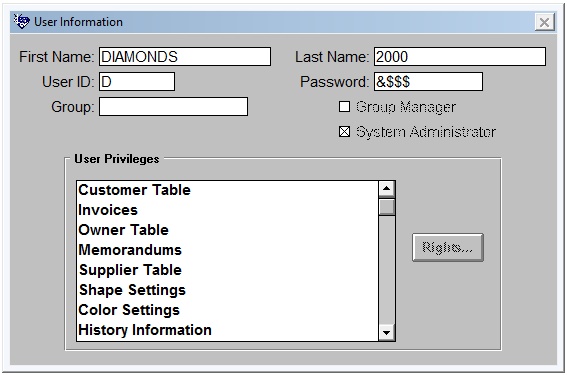
User Information – Access Privileges Form
This is the form used to assign User Access Privileges. It is called from the User Information option on the Administrator menu in the application.
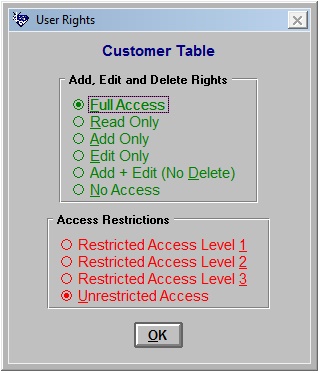
User Rights Dialog
This is the screen where User Access rights are established. The following are valid rights and their descriptions:
Full Access The user can add, edit or delete records.
Read Only The user can view data but cannot add, edit or delete records.
Add Only The user can add new records but cannot delete or edit existing records.
Edit Only The user can change existing records but cannot add or delete existing records.
Add + Edit (No Delete) The user can add new records and edit existing records but cannot delete existing records.
No Access The user cannot access this portion of the application
Access Restrictions:
A user may also be assigned a restricted access level, from one to three or be given unrestricted access to a particular module based on the selections made from the Access Restrictions radio buttons. The effect of various access levels will vary from screen to screen. Access levels have no effect on users that have No Access to a particular screen or module.
Those screens are available only to users with System Administrator Rights.
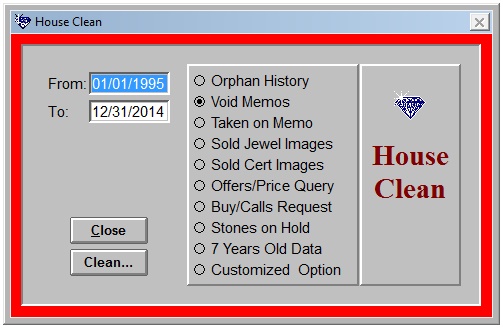
House Clean Screen
Type the starting date & ending date.
Select Option to Delete and Press the Clean… Button! When done Press DONE!
All History – Deletes ALL HISTORY between the given dates
Void Memos – Deletes VOID MEMOS only
Taken on Memo – Deletes Returned TAKEN ON MEMO only
Sold Certificates – Deletes SOLD CERTIFICATES Only
Sold Scanned Certs – Deletes SOLD SCANNED CERTIFICATES only
Offers/Price Query – Deletes ALL OFFERS/PRICE QUERY between the given dates
Buy/Calls Request – Deletes ALL BUY/CALL REQUEST between the given dates
7 Years Old Data – Deletes ALL DATA from 7 years and prior (sold & paid only)
Customized Option – Customized Options are Available for a Fee!!!
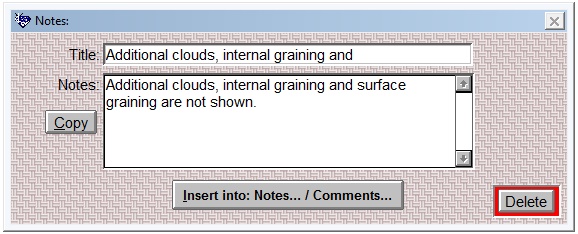
Notes: Data Entry Screen
This screen is Notes DATA!
To add a new Note record, press the Add New button in the Toolbar.
To edit Notes information, press the Edit button in the Toolbar.
As you enter data, watch the left side of the Status Bar for details.
To save press the Save button in the Toolbar.
Add notes like UN resolution and other notes to Invoices and Memos. Notes can also be used in: Phone Book, Customer, Supplier, Inventory, Certificate/Grading, Buy/Calls Request, and can be copied to clipboard.
See Also: Using The Toolbar (Last Page)
The Application Menu contains the Following Options:
File Menu Pad
Close – Closes the currently active window.
Printer Setup – Used to select the device and destination of output as well as configure a selected device.
Rebuild Indexes – Rebuilds indexes for data files used in the application.
Pack Databases – Removes all records that are marked for deletion in a table. This option is only available to the system administrator if the security module is included.
Exit – Ends the execution of the application and returns control to the system prompt.
Edit Menu Pad
Undo – Reverses the most recent text editing action.
Redo – Reverses most recently “undone” text editing action.
Cut – Removes selected text for placement in a different location.
Copy – Duplicates selected text for use in another location.
Paste – Places cut or copied text at the current cursor location.
Database Menu Pad
This is the menu’s item where all input forms are called.
Options Menu Pad
Top – Moves the record pointer to the top of the file.
Bottom – Moves the record pointer to the bottom of the file.
Next – Moves the record pointer one record forward.
Prev – Moves the record pointer one record backward.
Add – Used to enter a new record to the file.
Edit – Used to make changes to the current record that is currently displayed in the entry form.
Delete – Marks the currently displayed record for deletion.
Browse – Brings forward a browse window to scroll through the table and select a record.
Filter – Brings forward a dialog that allows the user to set a filter for the table.
Find – Brings forward a dialog that allows the user to perform a search for a record.
Order – Brings forward a dialog, which allows the user to select a different viewing order for the form.
Clear Filter – Clears any Filters that may have been set through the Find or Filter Dialog.
More – This option is only available after Add has been selected. The current information is saved and a blank record is displayed for adding purposes.
Save – The information displayed on the form is saved to the table. This option is only available after selecting Add New or Edit.
Cancel – All changes made to the information displayed on a form are discarded. This option is only available after selecting Add New or Edit.
Reports Menu Pad
This is the menu’s item where all reports are called.
Window Menu Pad
Move – Moves the current window to another location on the screen.
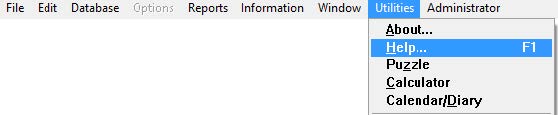
Utilities Menu Pad
About – Displays information about the application and system configuration.
Help – This item displays the Help window.
Change Password – The Change Password item will bring the Change Password dialog forward to allow the user to change his password.

Using The Toolbar
The Tool Bar contains push buttons that control movement through a table, it is activated when a data entry form is opened and it controls the entry form that is front most or active at the time.
The push buttons on the Tool Bar are as follows:
Scroll By: Allows the user to select the viewing order for the data.
First Moves to the top of the table.
Prev Moves the record pointer one record backward.
Next Moves the record pointer one record forward.
Last Moves to the bottom of the table.
Find Brings forward a dialog that allows the user to perform a search for a record.
Browse Brings forward a browse window to scroll through the database and select a record.
Filter Brings forward a dialog that allows the user to filter the information in the table.
Add New Allows the user to enter a new record to the table.
Edit Allows the user to make changes to the current record that is displayed.
More Saves the current record and allows the user to add another one.
Save Allows the user to save any changes made to a record through Add or Edit.
Cancel Reverses any changes made to a record that was Added or Edited.
Help For additional help, select Help from the Utilities Menu pad or press the key –F1
Close Closes the active window. (Front most screen)
Note:
The Save and Cancel push buttons are only available while the user is adding or editing a record.
The More push button is only available after Add has been selected.
Status Bar
The Status Bar contains information about movement through a table.
As you enter data, information about the field is displayed on the left side of the Status Bar.
When you select a menu pad or menu option, information about the menu or option is displayed in the status bar. Additional information displayed in the status bar includes the alias of the table/. DBF in the current work area, the current record number, and the number of records in the table/. DBF, the currently executing program, clock, NumLock, and CapsLock keys
Copyright DIAMONDS 2000
For assistance contact DIAMONDS 2000 at (212) 869-0017